
30.12.14
18.12.14

8.12.14
Holiday Table Runner Tutorial

I decided to make a table runner that's a grown up version and create a little tutorial for you. Mine is made out of burlap but coarsely woven linen could also be used for a more sophisticated version. This looks great as a Christmas runner but would also work well for Halloween and Thanksgiving. Make another one in a pastel color for spring holidays.
Materials and supplies:
3/4 yard burlap
matching sewing thread
1 skein size 5 Perle cotton either matching or contrasting
Fray Check
sewing machine
blunt end tapestry needle
***Please read through the entire set of instructions before beginning. If you are confused by anything feel free to contact me in the comment section. I'll respond promptly!
When you buy burlap, undoubtedly the edges will be crooked and fraying and it needs to be straighten it. Pull on a thread that runs the width (in this case the longer edge) of the fabric and pull it out. It will leave a ditch in the fabric. Cut along the length of the ditch.
 |
| cutting in the ditch created by the missing thread |
On the short edges of the runner is the selvage. The first thread on these edges need to be cut off because otherwise it will be impossible to fringe.
 |
| Cut off first thread along selvage edge |
at that mark. You will pull out a total of four threads, two the length and two the width of the piece.
 |
| Threads pulled out showing where the "ditches" intersect. |
Now that the fabric has been secured with machine stitches it's time to make the fringe. Pull out the threads from the outside edges and stop at the sewing machine stitches. It should look like this when you are done.
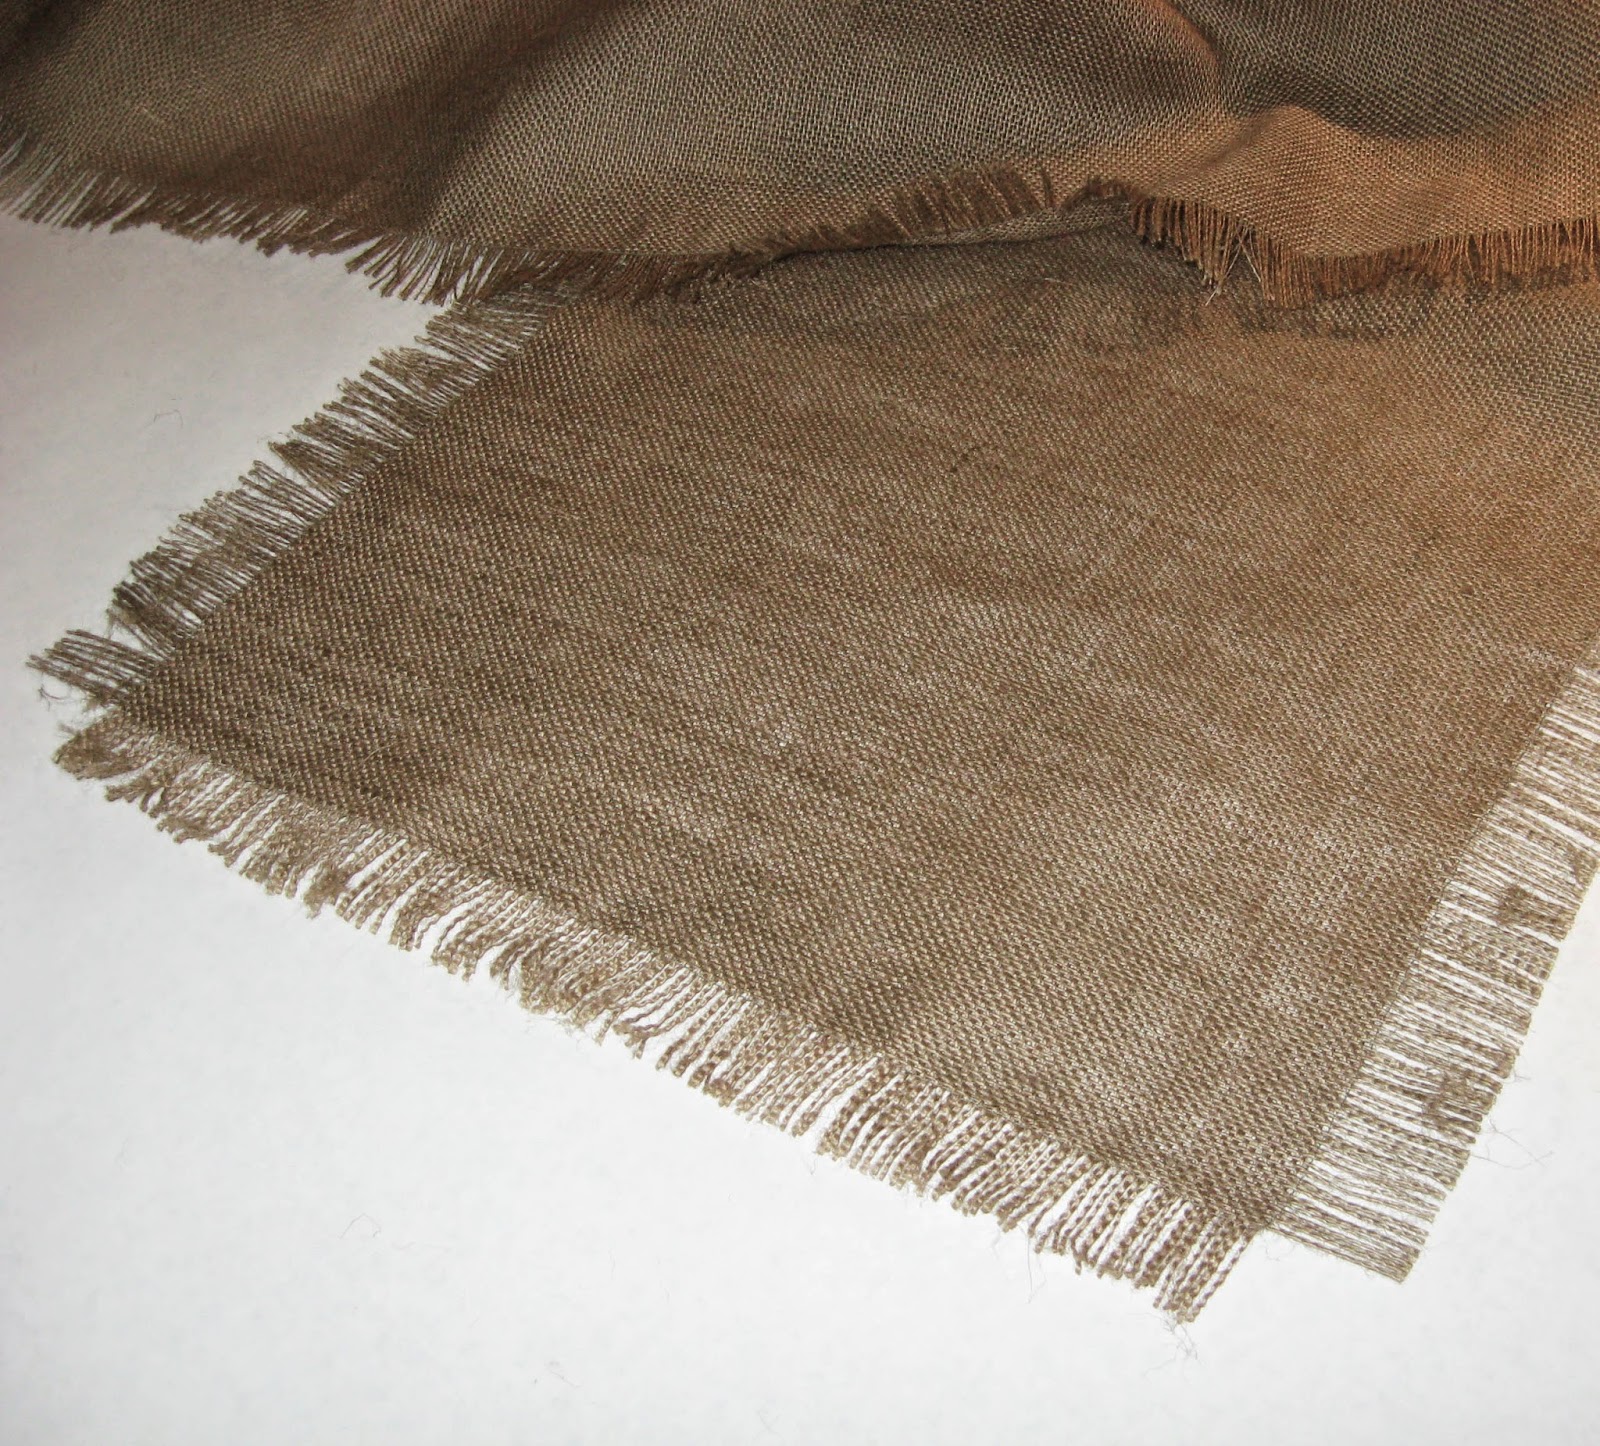 |
| fringe on all four sides |
 |
| measure in from corners and mark with pins |
 |
| threads removed |
To prevent the threads that were clipped from coming loose, put a small bit of Fray Check along the edge. Test this on a scrap to make sure it doesn't discolor the fabric.
 |
| Fray Check the clipped threads |
 |
| pulled thread decorative stitching |
 |
| Happy Holidays! Enjoy your runner! |
3.12.14
Bird Dance
 |
| Bird Dance |
22.10.14
No Candy Fun!
 |
| There are so many great non-food treats for Halloween. |
Now, add into this mix the children that have allergies to peanuts, wheat, dairy, soy or corn, the five most common food allergens. It is pretty hard to find a candy that doesn't include one or more of these foods so those kids probably have a pretty hard time enjoying the revelry. Another added benefit to skipping the candy is I don't eat half a bag before the big night.
So, what do I do instead? I've never had any trouble finding Halloween pencils, erasers, bouncy balls or other little give-aways. My parents haven't given out candy for many years and instead give nickels, that's easy and probably a lot cheaper! This year, because I knew I was going to write about this I went to three stores, Target, Shopko and the Dollar Store to see what I could find. I came up with all sorts of things as you can see in the photo. Everything I already mentioned as well as temporary tattoos, drinking straws, bubbles, little notepads, whistles and my favorite, glow-in-the-dark rubber duckies! I spent about 20% more, but in my mind, well worth it.
Food Allergy Research and Education (FARE) has developed a campaign to help kids with food allergies have a safer Halloween called the Teal Pumpkin Project. FARE is encouraging treat givers to offer non-food treats and let trick-or-treaters know by placing a pumpkin that has been painted teal and/or a sign, that is provided on their website, outside of the house. Please go check out their site and think about having some no candy fun!
If you are worried about disappointing the kids, don't be! They are pleasantly surprised to get something different.
 |
| Downloadable poster from FARE |
31.3.14
Rosemary Chocolate Chip Wonderfulness

For the last few weeks I've had the blahs. Some of that is the long winter (which, happily seems to finally be at an end) but also lack of sleep has contributed. So today I decided to do something to get cheery. There is a recipe that I found in one of my new favorite cookbooks that I've wanted to make for some time. The cookbook is Isa Does It by Isa Chanda Moskowitz creator of Post Punk Kitchen and Vegan chef Extraordainaire and the recipe is for Rosemary Chocolate Chip Cookies. If you have read my blog you might remember that I brought in six rosemary plants to winter in my dining room and I'm happy to say they are flourishing, so a very interesting way to use some of it. Now you may think this is an odd combination but I have to say I was pleasantly surprised by how good they are. Chocolate chip cookies for grown ups, I say!
Isa also has a video showing how to make the cookies if you dont have the cookbook and you can find it here.
27.2.14
Design in Vegas

Last month we took a warm weather vacation to Las Vegas. If you know me you would think Las Vegas is the last place you would find me but we met some friends and it was extremely entertaining ... a true escape. I was the only one that did any gambling and that was for about 10 minutes because I'd nearly doubled the $20 my dad gave me. I was leaving there a winner!!

We took a day trip to the Grand Canyon which scared the crap out of me, although it was beautiful. One of the highlights of the trip for me (besides the amazing sangria we had at the Wynn) was the Neon Museum. It is an open space filled with the cast off signage from hotels that either upgraded or went out of business. It was an artist's dream filled with beautiful rust and flaked paint. There were so many interesting things to photograph that I didn't really hear much of the tour guide's information.

If you ever find yourself in Vegas and want to see something other than casinos check this out.

19.2.14
Dreaming of Spring
 On the eve of the next big winter storm I worked on a little pencil drawing. I can't wait for this to be a reality. Enough said.
1.1.14
To New Beginnings

Subscribe to:
Posts (Atom)