 |
| Maple Leaves |
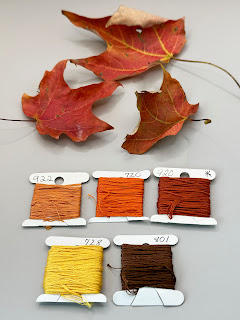
As promised, I have a few more color inspirations from my wander the other day. We are having another glorious sunny fall day and I have the most gorgeous maple tree in my backyard where these leaves are from. When looking at objects for color inspiration it is always so interesting to note, especially in natural objects like leaves, rocks and sticks, just how many hues and values can be found. These leaves range from a deep yellow all the way to a dark brown, with many colors in between. Of course, sticking with a few keeps stitching a bit easier.DMC 720, 728, 801, 920, 922
 |
| Thistles |
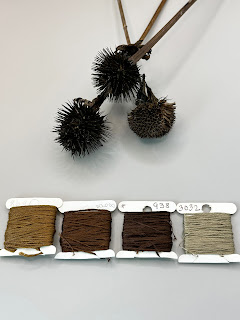
There are a few plants in our garden that have great seed heads and we leave them all winter for the birds. Since we get so much snow, they also are an interesting contrast in color and texture against all of that white.
DMC 869, 898,938, 3032
 |
| Autumn Color Palette |
When seen as a whole, all of the colors from the this post and the last create quite a lovely autumn color palette.
Row 1: 351, 922, 921, 920, 945, 720
Row 2: 3822, 728, 726
Row 3: 472, 471, 320, 3052
Row 4: 316, 917
Row 5: 3781, 869, 801, 938, 898, 3032
What are the ways you come up with color palettes?