8.1.15

Staying True


Steal Like An Artist by Austin Kleon
I just finished reading Steal Like an Artist by Austin Kleon, a small book and a quick read.  It made me want to run to the studio and kitchen and start making stuff.  The book is filled with little bits of wisdom and witticism that anyone that creates can relate to.  My favorite piece was called "Don't throw away any of yourself."  The idea is that we all have multiple interests and we shouldn't leave one behind to only pursue the other.  Eventually you'll feel like you've lost a part of yourself.

This struck home for me because I love being in the kitchen cooking away, the studio stitching like a crazy person and the garden watching it all happen.  When I read articles about blogging and choosing one focus it makes me a little nutty.  I'm not sure what to leave out because it wouldn't be me if I had to cut out the others.  This is not a new problem for me.  I went to art school to study textiles thinking I would then narrow down my focus.  Unfortunately I came away having had an amazing time but about a zillion more tricks in my bag.  Afterwards I was not a fun person to live with because I kept trying to figure out what path to take.  I eventually decided to focus on something where I could use as many techniques as I wanted.  Austin Kleon gave me permission to revel in it all.  I'm grateful.

5.1.15

Onions

Assortment of onions - yellow, white and red, shallots, pearl and green.
I've been thinking for awhile about posting some kitchen basics.  Utensils and kitchen equipment were a possibility but settled on foods I can't be without.  On the top of my list is onions.  Most of my favorite dishes start with sauteing some onion....soup, curry, pasta sauce and hamburgers get topped with a large helping of sweet fried onions. They are versatile and can be eaten in every way imaginable from strong and raw all the way to golden brown, sticky, caramelized deliciousness. 

One of the major drawbacks in cutting onions is the burning and crying that results from the chemical allyl sulfate that is released.  Using a sharp knife helps but I have been known to wear my swimming goggles if I have a large number of onions to dice.  It looks weird but it doesn't sting! On the bright side the more allyl sulfate an onion contains the longer its shelf life.

Roasting is one of my favorite ways to prepare most any vegetable, and onions are no exception. I tried these out and they were delicious.  However, I must warn you the oven temp is very high  and it caused a bit of a calamity when all of our smoke detectors went off.  I hope the tasty soup I'm going to make with these will make my husband happier than the alarms did.

These would be great served as an appetizer with Ranch dressing or a great addition to soup, pizza or pasta.
Roasted Onions


Roasted Onions

3-4 white onions, peeled
4 Tablespoons olive oil

*Preheat oven to 475 F
Put 2 Tablespoons of olive oil in a 9 x 13 pan and coat the bottom and sides.
Cut the bottom off of the onions so they will stand upright.  Cut an X into the top without cutting all the way through.  Oil the outside of each onion.  
Roast for 30 minutes.  Check to see if there is still oil in the bottom of pan and drizzle the remaining oil in pan and onto onions.  Roast for 10-15 minutes more.  
They may be charred at the tips but just cut the blackened parts off.  
Onions ready to go into the oven.


2.1.15

Hello 2015!


Before the new year arrived I was hearing a lot about whether to make resolutions.  Some suggested that instead of making resolutions make goals.  I'm not exactly sure what the difference is. Others chose to have nothing to do with any of it.  My sister-in-law has been simplifying her life by downsizing her belongings and eliminating activities she doesn't find fulfilling, a laudable goal and I am inspired by her.  So, I pondered that for a bit.  If I had made resolutions/goals/whatever they would be the usual. You know, eat healthier, exercise more, blog more, clear some clutter, learn all sorts of new things - a language, perhaps. Actually the mere act of going through this list makes me cranky.  A new year does make me want to begin something new and different.  Unlike my sister in-law I kind of like stuff.  Except the stuff in this drawer.  It is a mess. My resolution, it turns out, is to clean out this kitchen drawer.  Perhaps tomorrow.

8.12.14

Holiday Table Runner Tutorial

Long ago when I was in fifth grade art class we made burlap place mats.  We pulled out threads and wove in yarns. I thought it was the most wonderful thing I'd ever made.  Mine was white burlap with lime green thread...beeautiful!

  I decided to make a table runner that's a grown up version and create a little tutorial for you.  Mine is made out of burlap but coarsely woven linen could also be used for a more sophisticated version.  This looks great as a Christmas runner but would also work well for Halloween and Thanksgiving.  Make another one in a pastel color for spring holidays.

Materials and supplies:
3/4 yard burlap
matching sewing thread
1 skein size 5 Perle cotton either matching or contrasting
Fray Check
sewing machine
blunt end tapestry needle

***Please read through the entire set of instructions before beginning.  If you are confused by anything feel free to contact me in the comment section.  I'll respond promptly!

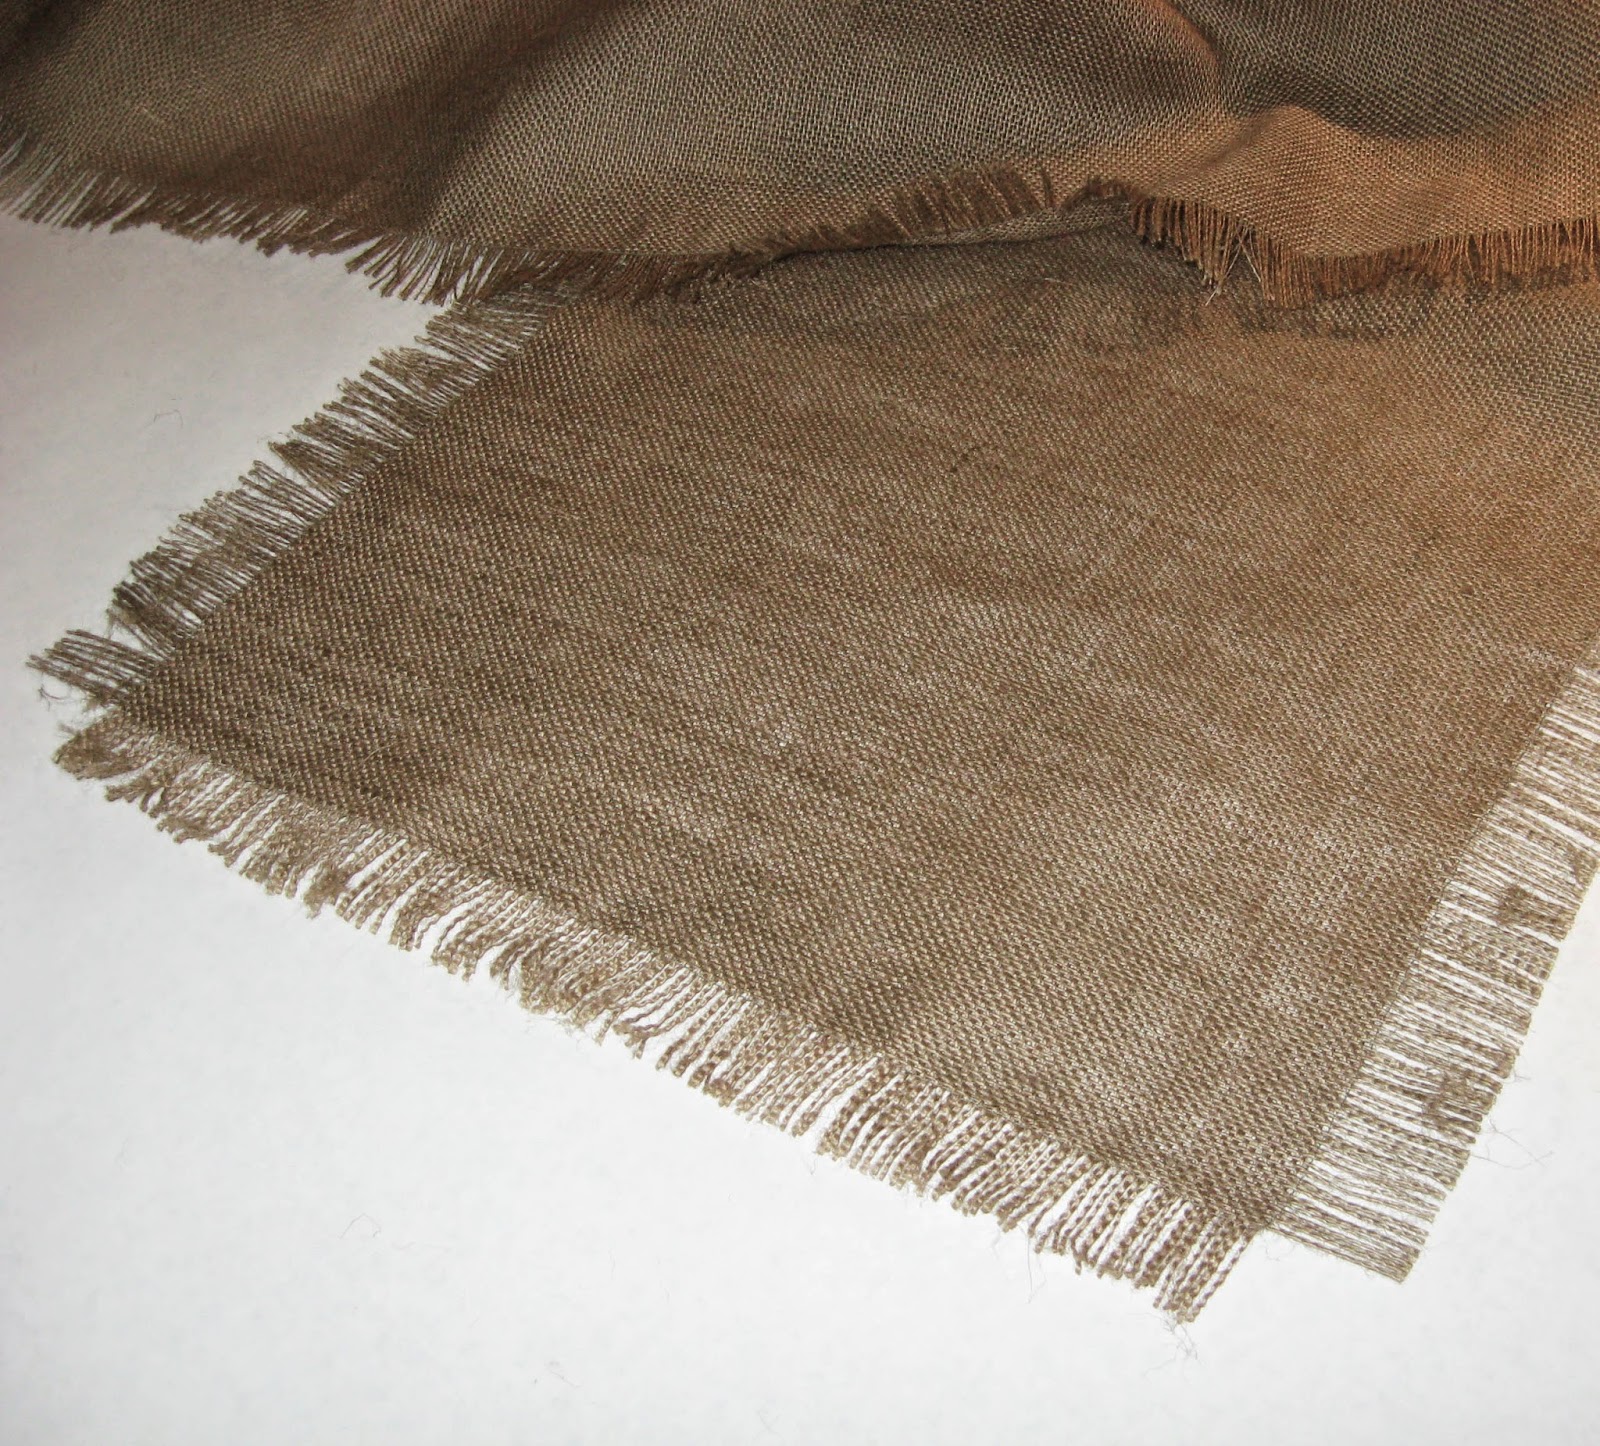
When you buy burlap, undoubtedly the edges will be crooked and fraying and it needs to be straighten it.  Pull on a thread that runs the width (in this case the longer edge) of the fabric and pull it out. It will leave a ditch in the fabric.  Cut along the length of the ditch.
cutting in the ditch created by the missing thread

My runner is 14 inches wide plus 1 1/2 inches of fringe on both edges for a total of 17 inches.  From the edge that was just cut, measure 17 inches and similarly, pull out a thread to mark the other edge.  Cut along the ditch left after pulling out the second thread.  Put the rest of the fabric aside.  We will only be working with the 17 inch width of fabric from now on.


On the short edges of the runner is the selvage.  The first thread on these edges need to be cut off because otherwise it will be impossible to fringe.
Cut off first thread along selvage edge
Measure 1 1/2 inches in from each side on all four sides and pull out the thread

at that mark.  You will pull out a total of four threads, two the length and two the width of the piece.
Threads pulled out showing where the "ditches" intersect.
When the threads are pulled all four corners of the fabric should look like the photo above. Now you need to make sure the threads don't fray like crazy! Using a sewing machine and matching thread sew along the ditch that has been made from the missing threads.  ***Important*** when you get to the place where the ditches intersect STOP!!!  Leave the sewing machine needle down, turn the fabric 90 degrees and continue sewing down the next ditch.  If you accidentally sew all the way to the edge of the fabric it will be difficult to fray it.

Now that the fabric has been secured with machine stitches it's time to make the fringe.  Pull out the threads from the outside edges and stop at the sewing machine stitches. It should look like this when you are done.

fringe on all four sides
Next I made two rows of pulled embroidery, one on each side of the length. For each row measure in 1 1/2 inches from the corner of each edge and mark with pins.
measure in from corners and mark with pins
Pull out about an inch of threads from the inside corner of the pins.  To do this, carefully cut the long threads along the short side of the runner until you have clipped about an inch. See photo below.  Pull on one of the long threads in the middle of the group of cut threads and follow it the length of the runner.  Clip this thread 1 1/2 inches from the other edge.  Repeat this until an inch of threads have been removed the whole length of the runner.
threads removed

To prevent the threads that were clipped from coming loose, put a small bit of Fray Check along the edge. Test this on a scrap to make sure it doesn't discolor the fabric.
Fray Check the clipped threads
After the Fray Check has dried it's time to embroider.  Measure a length of Perle cotton 2 1/2 times the length of the pulled threads and thread it on a blunt end tapestry needle.  This amount of thread can get a little tangled and out of hand so working on a cleared table space and pulling it very slowly can help keep it straight.  Tie a knot in the end of the thread and come up from the back a few threads away from the clipped edge.  My runner uses matching Perle cotton but I used a contrasting color in the stitching sample.
pulled thread decorative stitching
Put the needle under 5-7 threads and loop the thread under the tip of the needle as shown in the photo.  Carefully pull the needle and tighten up the Perle cotton which will pull the burlap threads into a little group.  Continue across the whole length of the pulled threads.  Here is a link for a bit more on pulled thread embroidery (also known as drawn thread and hem stitching)
Happy Holidays!  Enjoy your runner!

3.12.14

Bird Dance

Bird Dance
The other day we had a fresh dusting of snow and I came upon a record of a little bird dance. Winter.  Here it is.  I'm wondering what is inspiring you in this new season?